To add a payment to a registration:
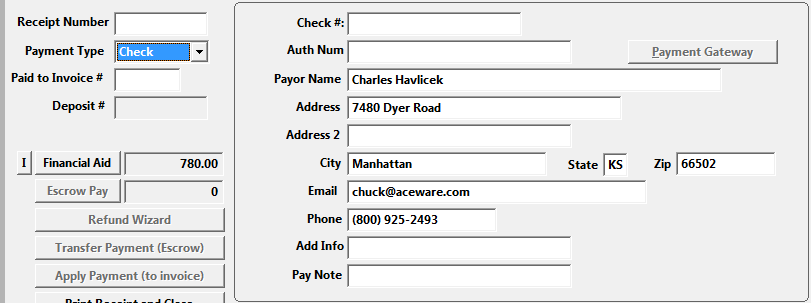
- Click the Payments button. The Payment screen opens:
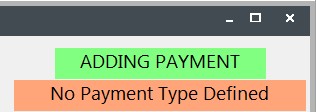
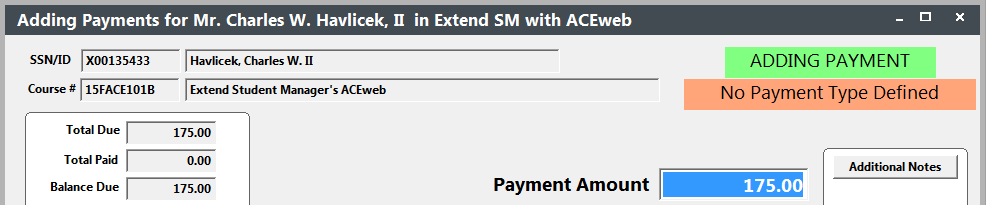
- If there are no payment records created for this registration yet, the Payment screen automatically opens in ‘Add’ mode ("Adding" appears in the top right of the Payments screen in Green. The No Payment Type Defined message will also be displayed because a payment type has yet to be selected.). Continue to step 2.
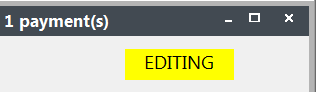
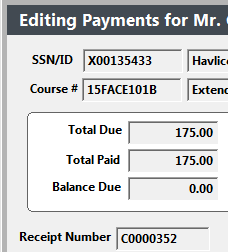
- If there are existing payment records, the Payment screen opens in 'Edit' mode ("Editing" appears in the top right of the Payments screen in Yellow). Click the Add button to make a new payment then continue to step 2.
- By default, the total amount due will be entered into the Payment Amount field. If necessary, adjust this amount (e.g. if the individual is only making a partial payment).
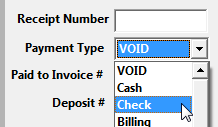
- When you select the payment type, the Payment Detail fields become available for you to enter payment details (i.e. check number, P.O. number if Billing is selected, payer, etc.).
Live Credit Card Processing - if you are processing live credit cards, continue with step 4 of the Making a Credit Card Payment instructions.
- Click the Save button to save the payment. When you click this button, the payment record is created and the next available receipt number is assigned to it.
You can now print a receipt by clicking the Print Receipt and Close button.
Billings
If you selected the 'Billing' Payment type (in step 3 above), the "Invoice" label appears on the screen and the P.O. # field becomes available.
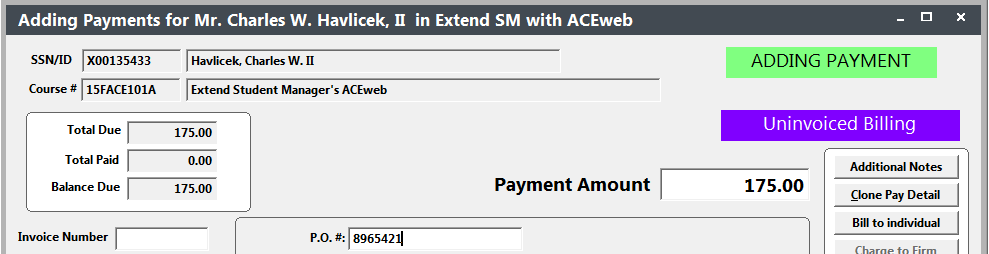
When you enter the appropriate billing information and click the Save button, the payment record is created but no Receipt Number is assigned. This is because billing records are not actually payments and should not receive Receipt numbers. Company Invoicing users will assign an invoice number to billing records when printing new invoices.